If you can hold your digital point and shoot camera still and frame your shot the way you want, then you can probably compose a really nice photograph that needs little or no adjustment. But, why not make it better?
With some easy Adobe Photoshop CS3 digital photography tips, it's easy to take a good image and punch it up a little to turn it into a great image. Color and toning for instance: with just a couple small modifications in Photoshop you can improve both and bring your subject forward for improved clarity and contrast.
Below is a short Adobe Photoshop tutorial that I use (most of the time without modifying my steps) for almost every digital photograph I take. It improves color, toning, and contrast all at the same time.
This simple daisy photo was taken with a Samsung Digimax A50 digital camera. Obviously it's a point and shoot model.
First I applied the Unsharp Mask with these settings: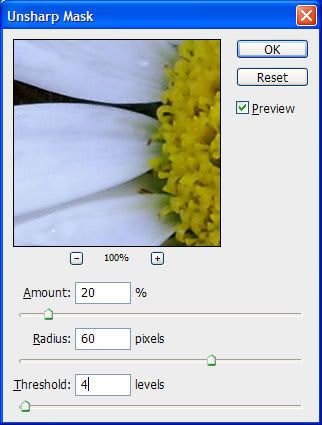 Next, I duplicated the background layer and set it to Screen mode like so:
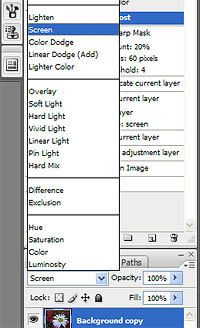
Then I set the opacity of the modified layer to 30% like so: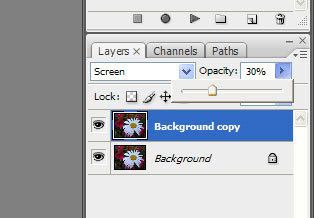
Next, I created a "Hue/Saturation adjustment layer" with the following settings: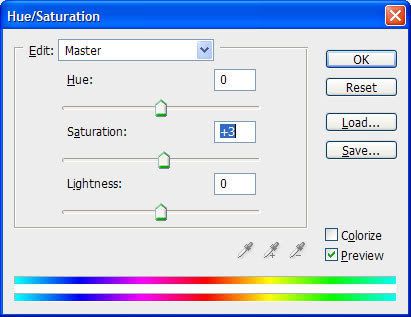
And finally, just flatten your image and you're done! Here is the final result: As you can see, the image has been lightened, contrast has been increased, and color tone/balance has been improved. The digital photograph is now ready for further enhancements, which can easily be done using Photoshop CS3.
Friday, April 18, 2008
Digital Photography Tips, Basic Color Boost, Photoshop
Subscribe to:
Post Comments (Atom)

No comments:
Post a Comment